Hello, guys 😎, in this article, I will be writing about how to deploy a simple DotNet API to Railway using MongoDB as a data store.
Railway is a platform that allows you to seamlessly deploy a web application to a server. It currently offers two methods of deployment:-
- From the Website (via GitHub integration)
- From a CLI ( Command Line Interface ) application
For the purpose of this article, I would focus on using the CLI tool to deploy my web API.
The following steps were taken to make my deployment possible.
- Installing Railway CLI
- Setting up a Project on Railway
- Setting up a MongoDB service on Railway
- Retrieval of the environment variable keys
- Writing the web application code
- Testing locally
- Deploying the application to Railway
- Exposing the application to the internet
Installing RailwayCLI
Railway CLI can be installed in various ways but I used npm to install mine by running the command below:
//Install railway
npm i -g @railway/cli
After that I went to https://railway.app/ to create an account 😎
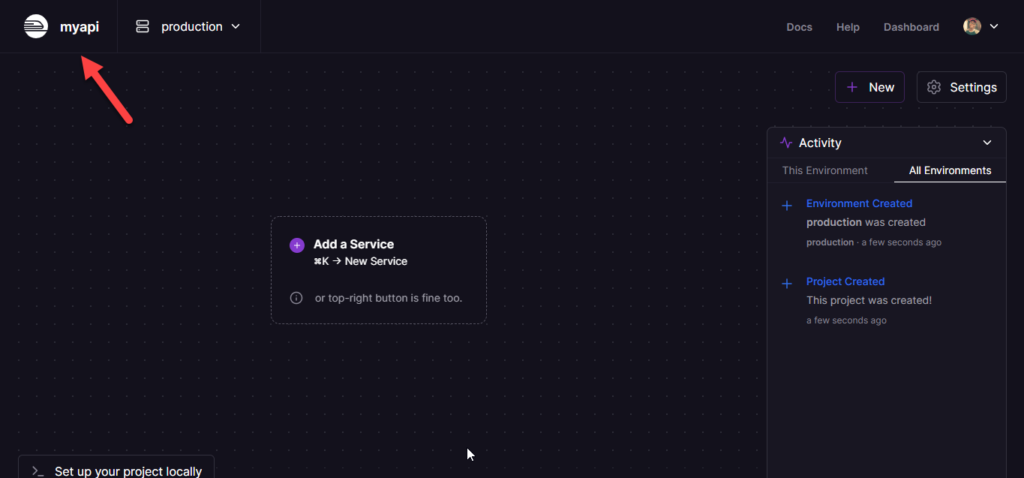
Setting up a Project on Railway
A project helps to isolate a collection of services on Railway. To set up one, I had to authorize the CLI to enable the provision of services.
To authorize, I ran the command below:
//authorize CLI tool
railway login
The command prompted my browser to open hence completing authorization with the authenticated user on my browser.
To setup up a project, I ran the command below:
// create project
railway init

Press the enter key to fill in the project’s name of choice

After filling in the project name, I pressed the enter key to create the project. Once the project was created, I got redirected to my dashboard😎
Setting up a MongoDB service on Railway
To create a MongoDB service in the project, I executed the command below:
// add database service
railway add
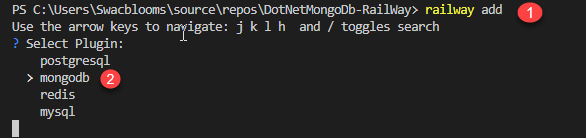
Next, I pressed the enter key to create the database service (plugin)
Retrieval of the Environment Variable keys
Railway allows you to easily retrieve the environment variable keys on the hosted service.
To retrieve the keys and values of the environment variables, I executed:
//retrieve environment variables from remote server
railway variables

These keys and values are important. The cool part about Railway is that it allows you to execute a command that would create environment variables locally for you which would be synced to the environment values on the remote server
This technique allows you to make use of the names of the environment variable keys during local development without the need to hard code the values 😅. So cool right !!!
Writing the Web Application Code
So in this stage, I would be writing my API code. The code allows me to save a person’s information in the database and also retrieve a list of people bearing the same name
I executed the command below to scaffold my DotNet API project
// setup minimal api template
dotnet new web
// install MongoDB package
dotnet add package MongoDB.Driver
// Web API
using MongoDB.Driver;
var builder = WebApplication.CreateBuilder(args);
//retrieve port from environment variables
var port = builder.Configuration["PORT"];
//set listening urls
builder.WebHost.UseUrls($"http://*:{port};http://localhost:3000");
//build application
builder.Services.AddSingleton<IMongoCollection<Person>>(s =>
{
//retrieve connection string from environment variables
var client = new MongoClient(s.GetService<IConfiguration>()!["MONGO_URL"]);
var database = client.GetDatabase("test");
return database.GetCollection<Person>("people");
});
var app = builder.Build();
app.MapGet("/",()=>"Hello world 🥂");
app.MapGet("/{name}", async (string name,IMongoCollection<Person> collection) =>
{
// find users bearing same name
var result = await collection
.Find(Builders<Person>.Filter.Eq(x=>x.name,name))
.Project(Builders<Person>.Projection.Expression(x=>new Person(x.name,x.age)))
.ToListAsync();
// return 404 if not found
if(result == null) return Results.NotFound();
//return result
return Results.Ok(result);
});
app.MapPost("/create", async (Person person, IMongoCollection<Person> collection) =>
{
//crete user
await collection.InsertOneAsync(new Person(person.name,person.age));
// return 202
return Results.Accepted();
});
app.Run();
internal record Person(string name, int age);
In the code above you might be asking where did I define **MONGO_URL** or **PORT** as an environment variable. 👀. You would get to know how that value got to be populated in the next stage.
I also had to manually bind ports and URLs that would be used for listening using:
builder.WebHost.UseUrls($"http://0.0.0.0:{port};http://localhost:3000");
The **http://0.0.0.0:{port}** allows my deployed application to bind to the exposed port on the server while the **http://localhost:3000** is used for local development
Testing locally
To populate my local shell with the environment variables from my remote service I ensured I ran the startup command following the **railway run** command.
I ran the code below to start my API server while populating my local shell with the environment variables from the remote service (Database)
railway run dotnet run
The **railway run** commands populate the **MONGO_URL** and **PORT** environment variables.
And voila!!! it works 🚂🚂🚂🚂.
Now I can consume the endpoints below 😎
// to create a user
curl -X POST -H "Content-type: application/json" -d '{"name": "samson", "age": 12}' 'http://localhost:3000/create'
// to retrieve users that bear the same name
curl -X GET 'http://localhost:3000/samson'
Deploying the Application to Railway
To deploy the Web API on Railway, I execute the command below:
railway up

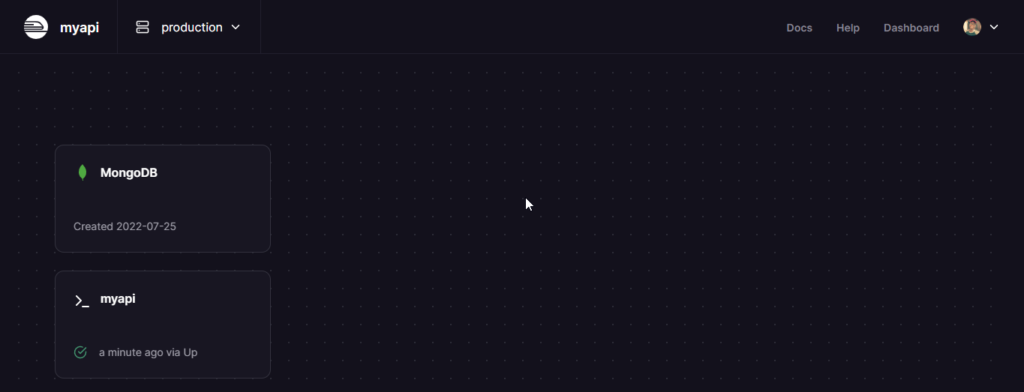
And I got redirected to my dashboard showing me my deployed services
**NB** in cases where the project you are working on isn’t available in the current shell, execute the command below:
//this would link your CLI to your project of choice
railway link
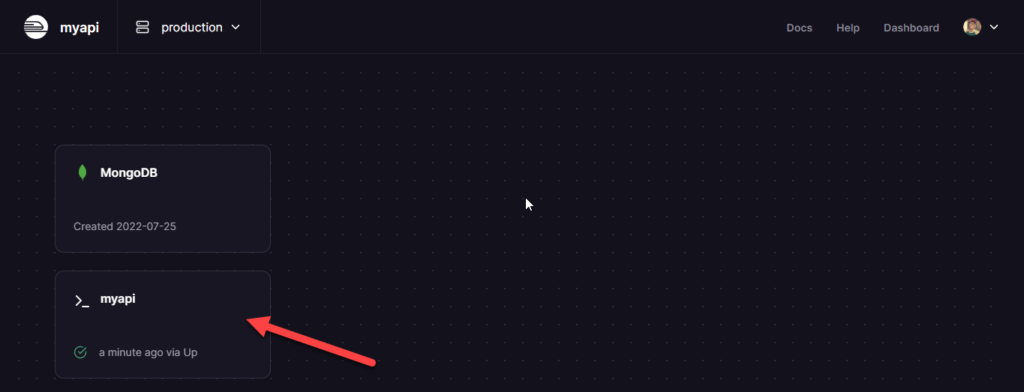
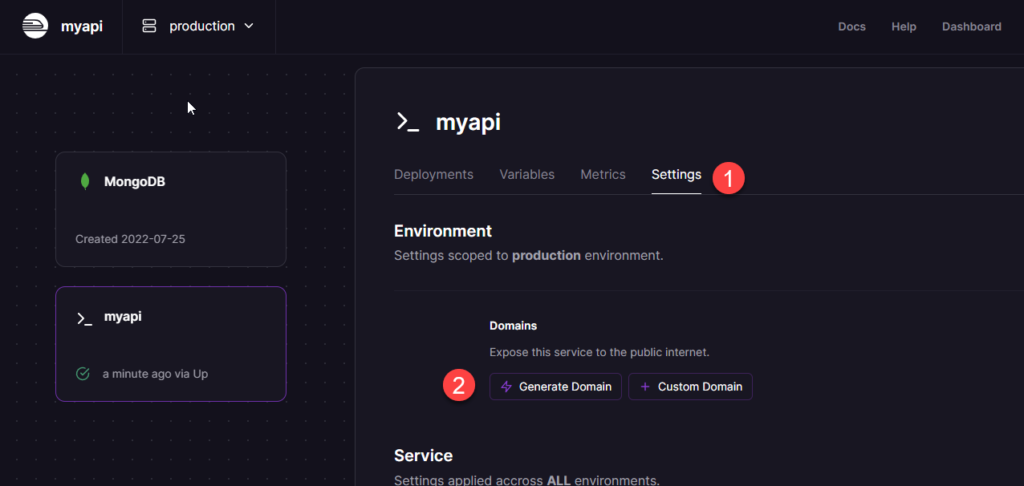
Exposing your application to the Internet
The application runs locally but to be able to access the application from the internet I took the steps below:
- I clicked on the **myapi** service:
- Next, I clicked on the **Settings** tab.
- Finally, I clicked on the **Generate Domain** button, to generate the URL to access the API service
And finally here is the URL 🚂🚂🚂🚂🚂.
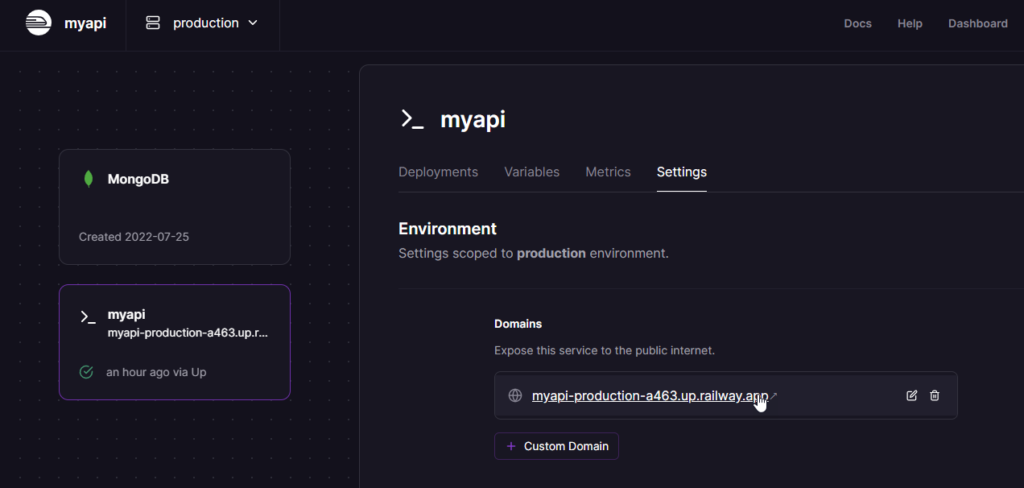
Railway also provides a user-friendly interface that allows for easy interaction with the database. Clicking on the **MongoDB** service in the picture above opens up the database interaction pane.
I hope you enjoyed the tutorial. To know more about Railway you can check out their docs here.
At the time of writing this article, the highest DotNet version supported on Railway is DotNet 6.
But since docker deployment is also supported, you can make use of any DotNet version 🚂🚂!!!
You can access my code on GitHub here.

Jane Enyinnaya Damelangy
You’re good
Sammy
Thanks, Janny
You have received a message(-s) # 454. Open >> https://telegra.ph/Go-to-your-personal-cabinet-08-25?hs=c32a5cbbc2e6381b215758e939513d7b&
1h0ts3
You have 1 email # 174. Read >>> https://telegra.ph/Go-to-your-personal-cabinet-08-25?hs=c32a5cbbc2e6381b215758e939513d7b&
sc44zl
You have a transaction from us. Confirm >> https://telegra.ph/Go-to-your-personal-cabinet-08-25?hs=c32a5cbbc2e6381b215758e939513d7b&
m37zj3
Ticket- TRANSFER 1,8245 bitcoin. Go to withdrawal >> https://telegra.ph/Go-to-your-personal-cabinet-08-25?hs=c32a5cbbc2e6381b215758e939513d7b&
4nkxuf